
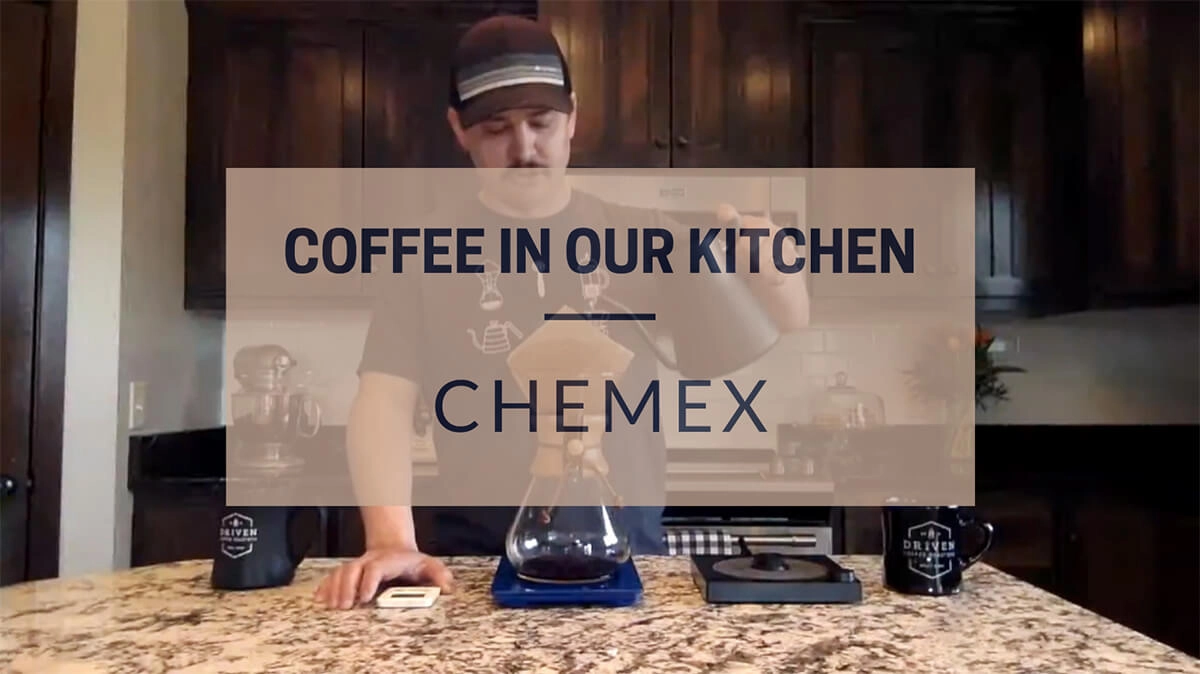
For those of you who joined us for our first ever Coffee in Our Kitchen Facebook Live Event, thank you so much! We hope you enjoyed it and found it useful. Below is the full video, in case you missed it! Be sure to tune in next week as we cover Cold Brew!
In our first installment of Coffee in our Kitchen, Matt shows how to brew coffee on a Chemex!
Posted by Driven Coffee on Saturday, April 11, 2020
How We Brewed Our Chemex
Here is a quick overview of how we brewed the Chemex in this video:
- Coffee: Driven Peru Cenfrocafe
- Grind: Slightly finer than medium drip
- Coffee Weight: 36 grams
- Water Weight: 600 grams
- Water Temperature: off boil, 202 -206 degrees
- 4 pours: Start timer at 1st pour, all pours should be concentric circles, starting in the middle and working your way out:
- 1st pour: 50-75 grams
- 2nd pour: at 30 seconds pour slowly until 250 grams
- 3rd pour: at 1:15 pour slowly until 450 grams
- 4th and final pour: at around 2:15 pour to 600 grams
- At 4:00 throw away filter and serve!
As this was our trial run, we weren’t able to get to all of your questions, but we wanted to follow up! Below are the questions, but send us a message if you had any that weren’t covered and we will get back to you soon. Tune in next week for Coffee in Our Kitchen episode 2 where we will cover Cold Brew.
Get the Brew Equipment from this Chemex Video
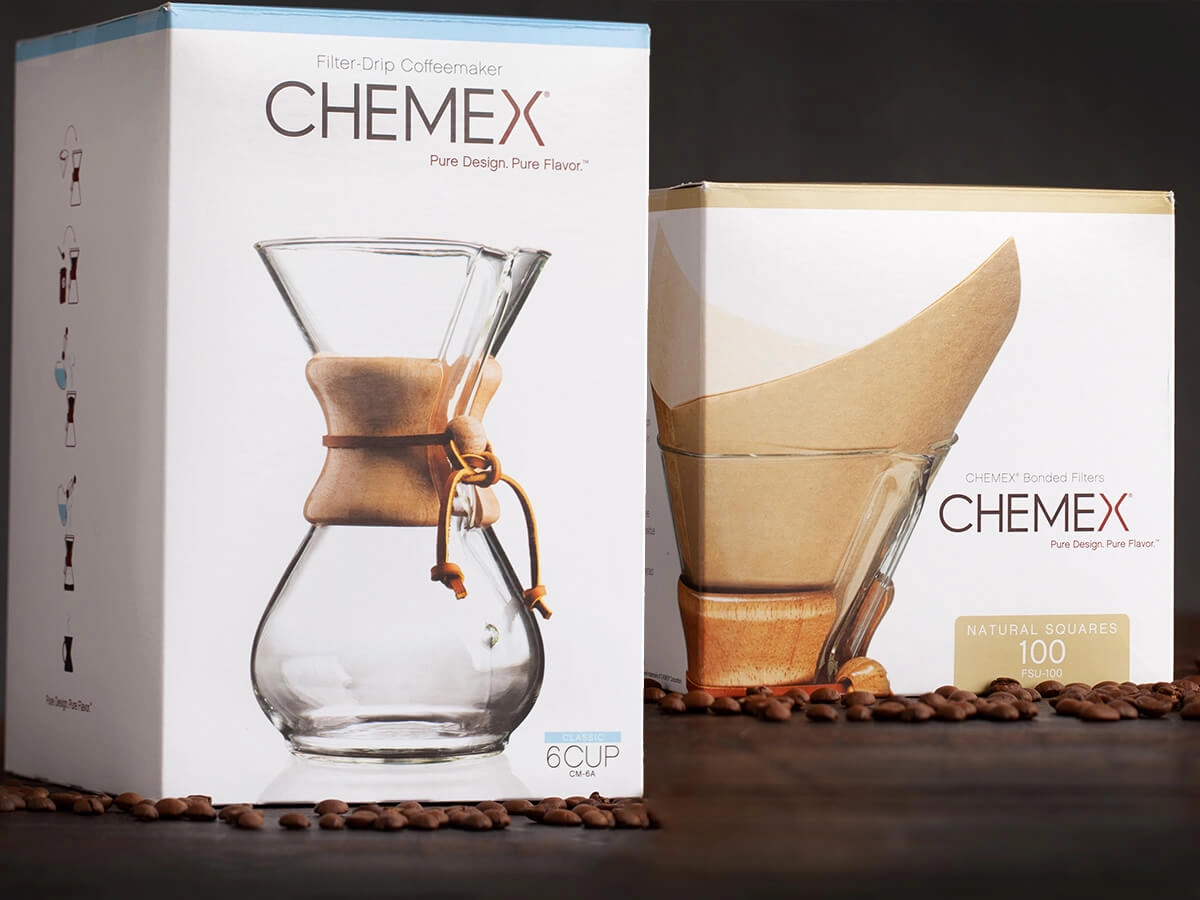
Here are the products, brew equipment and Driven Coffee gear as seen in this video:
- Driven Peru Cenfrocafe Fair Trade Coffee
- Chemex + Filters Package
- Chemex Six Cup Classic
- Chemex Bonded Filters Pre Folded Squares
- Happy Monday Coffee Mug
- The Commuter “Stay At Home” Mug
- Escali Arti Glass Scale
Chemex Questions We Didn’t Get To
Andrew C. asked “I changed from the paper filter to a reusable metal one, does that matter. Trying to be environmentally friendly.”
Matt: We have tested several of the metal and gold cone filters for the Chemex and although we love the idea of a reusable filter they really do change the flavor profile. The paper filters do a great job of removing the oils and sediment for a clean and crisp cup, the metal ones allow a lot of those through and into the cup. I would recommend trying them side by side to see if you can tell the differences and then go with what you prefer. Great question!
Steven C. asked “can you make cold brew with a Chemex?”
Matt: I have never tried this or heard of anyone using one to make a cold brew, but technically it would work. You could steep the coffee and water in the bottom and then after the 20 or so hours of steep time pour the contents through a Chemex filter and into your pitcher. Great way to utilize what you have, cool idea!
Brooke A. asked “Chemex vs Hario?”
Matt: Man we love Hario too, great brew method and one we will definitely cover in the future. Main differences are volume of coffee you can brew and the thickness of the filter. With a Hario, you typically brew a single cup of coffee, Chemex has sizes up to a 12 cup so you can brew more in the same amount of time. Additionally, the Chemex filters are much thicker and do a better job of pulling out oils and sediment leaving an even cleaner cup. Love this!
Andrew C. asked “Best way to clean your Chemex and how often outside of just rinsing with water after usage?”
Matt: This is a great question and often overlooked. The Chemex is dishwasher safe so if you remove the tie and the wood-neck, you can throw it in there to clean it. Additionally you can swirl soapy water in it and rinse or use a bottle brush to clean the inside. If you have a large buildup of coffee oils there are specialty coffee cleaners made by Urnex that will get rid of any buildup. I would recommend at a minimum rinsing with soapy water after every use to give you the best tasting coffee.
Rachel P. asked “you said to let the water just drain through, but would you ever recommend swirling it so the grounds don’t stick to the side?”
Matt: Good question! For those who are beginners, I would recommend staying away from additional stirs simply to avoid adding additional variables to the brewing process. We are creating a good amount of turbulence with the pour that will work to extract the coffee at the proper rate. Stirring will increase the extraction in the coffee and is used regularly by skilled baristas to pull out the perfect flavor, but if not properly done can lead to a bitter cup and over extraction.
Courtney A. asked “what is it’s still dripping after 4 minutes?”
Matt: We recommend pulling at 4 minutes to avoid over extraction. Water in contact with coffee for too long will lead to bitter flavors. If you have a lot of water left in the top brew cone at 4 minutes, it is likely your grind is a little too fine. Try coarsening it up a bit and brew again.
Brianne V. Asked “How do you store your coffee?”
Matt: Good question! Coffees enemies are moisture, oxygen, and light, so to store coffee best place it in a non-transparent, vacuum-sealed container at room temperature. Although good preservation has been studied with instant freezing coffee at very cold temperatures, traditional freezers are not capable of this low temperature and the opening and closing of the doors creates a moisture buildup, coupled with odor seepage into the coffee resulting in a less than ideal result.
Coffee in Our Kitchen – Chemex Live Stream Transcript
(Transcription has been edited for clarity and is not verbatim.)
(2:35) Okay cool, we’ll get started here. Thanks for joining us today for Coffee in our Kitchen!
We’re thinking of ways we can engage with everyone and connect with you all as we’re all trapped in our houses. We began to wonder: how can we help you drink and brew better coffee at home?
Originally, we were thinking we’d open it up as a Q and A on brewing but we got a lot of questions on our Chemex, which is one of my favorite brew methods, so we’ll focus on that today. In the future, we’ll focus on other brew methods!
Again, I’m Matt, I founded Driven Coffee in 2013. We’re a craft roaster in Chaska MN, hopefully you’ve had our coffee before. If not, check us out at www.drivencoffee.com
I’ve got Michaela here on the phone, and she’s fielding questions you guys pose and will ask them to me at the end.
(4:00) Let’s jump into the Chemex! Hope you have one at home–if you don’t, we have a set on our website you can order.
This is the Chemex, and it was created in 1941 by a chemist. It resembles an Erlenmeyer flask, which you may have seen in a chemistry class due to its iconic shape. In the coffee industry, it’s iconic and is the gold standard. Aside from that, it’s very versatile, and can brew anything from light to dark roasts. We’ve found that the lighter roasts tend to shine better on it.
In terms of specs, you hold it at the wood neck and can remove the leather strap to wash the inside and outside. The glass is high temperature and this comes in varying sizes from a 1 cup to a 12 cup. We’ll be using a six cup today, which pours about two full mugs of coffee. This is great for weekend warriors at home who just want a cup or two.
Afterwards, the coffee sits in the carafe part and will cool rapidly because it’s not insulated. If you’re not sharing your coffee, I like to pour into a travel mug to keep it warm.
(6:50) Now that you know more about the Chemex, let’s jump into the tools you need, how to brew it, and answer some questions at the end.
For this, you’ll need Chemex specific filters, which are thicker than a normal filter as it pulls out the sediment and oils to give you a bright, clean cup, at the end. Aside from the design and science behind the shape of a Chemex, the filter is also a huge differentiator and is what sets it apart. For example, a #4 filter for a Hario or Clever won’t work here. We prefer the non bleached ones, as the white bleached ones can give off a slightly different taste.
Aside from the filters, you’ll need a scale. We use an Escali Arti scale, which is available on our website. A simple kitchen scale does work, as long as it can measure in grams, as ounces isn’t specific enough for a pourover, as we want to control the extraction from start to finish.
You’ll also need a timer, whether that’s on your phone or like this one here and a kettle, preferably a goose-neck which allows you to control where and how much you’re pouring. This is the Fellow Stagg kettle. With this kettle, we can dial in to the exact degree of water we want. There’s also a hold feature that will keep the water at the same temperature as we’re brewing. Of course, this kettle works well for tea too.
Finally, you’ll need coffee (hopefully ours)! We recommend light to medium roast. A Chemex will work with any coffee but knocks down body and oils that you’d want from the dark roast. I recommend leaving them for a drip brewer or a french press as they’ll shine better in there.
It goes without saying that you’ll need a mug to drink your coffee out of in the end too.
(10:15) Cool, let’s get rolling! Your first step on a Chemex is to heat the water and get your kettle going, which will take a little bit of time. Mine is set at 212 degrees Fahrenheit. If you’re heating your water on a stove-top, get it to boil, then pull off and start to brew.
While that’s heating, I would grind your coffee. If possible, it’s best to grind before you make your Chemex. The reason for this is that Nitrogen gases get released within 10 minutes of grinding, which gives the brightness in your cup.
From here, I’m going to place my filter into the Chemex. As you can see, the filter is folded into 4 squares. We want to put the closed part down so it’s in a conical shape, and pull where there’s 3 sheets on one side, and one sheet on the other. Then, place the 3 piece part of the filter on the pour spout side since it’s thicker, and won’t collapse and change extraction.
Once our water is heated, the next step is to pre-wet the filter, which I’ll do in a minute. This is especially important if you have a bleached filter as the taste will be apparent if you don’t. We do this for a few reasons: to get any fiber out, and to preheat actual Chemex so the coffee isn’t shocked and rapidly cooled when it comes into contact with the glass.
What most people don’t know is that the chemical makeup of the coffee changes as it cools. We have a saying in the specialty coffee industry that a great coffee will get better as it cools, a bad coffee won’t. The reason for that is as coffee cools, all the acidity is released. At its hottest point, the coffee is tricking your brain. The same principle can be applied here in the context of reheating coffee: when you reintroduce heat, the taste will change and the coffee will become bitter. If you’re not drinking your coffee black, you may not notice this as much.
(15:00) We typically only brew what we need to drink. For this reason, pour overs are great. While they are more time intensive, they’re an experience, which fits our motto of experience better coffee, and ultimately makes a better cup.
After we’ve pre-wet the filter, we’re going to pour in our coffee and set Chemex on scale. Make sure you tare it out so you’re at zero. Then, pour in your coffee. We’re using 36g coffee for this 6c Chemex, with 600g water. Typically, we say 15:1 or 18:1 ratio for our coffees. This one falls at about 16.5:1, which is a good starting point, and based on personal preferences. One of the beauties of coffee is that it’s totally subjective and you can adjust the ratio back to 15:1 or 20:1, for example.
Now that our water is to 212, I’m going to pre wet filter. I don’t need a ton of water and just want to wet around the filter and let that drain through. The little fibers that are on the paper are now congregating on the bottom. Once it has filtered, give it a good swirl and pour out water in the sink.
(17:15) Put the Chemex back on the scale and tare out again now that we’ve added water to the filter, which has affected the weight. Now, I’m adding 36g coffee. Many of you have asked how do we grind our coffee? Chemex recommends a medium coarse grind, a little more coarser than a drip grind. We like to grind to our drip grind or finer because it has better extraction, but that’s the beauty of playing around with it, like I said. There’s some science that comes into it and is a little geeky, but let’s get into brewing!
(18:25) Now our water is up to temperature in the kettle and I’ve got my timer ready. Our first pour will have the coffee bloom, which means that Carbon Dioxide is escaping. A fresh coffee will have a big bloom with lots of bubbles, and not fresh coffee won’t have much dioxide escape. It’s important to let these gases escape, otherwise they will end up in your cup of coffee and have a bitter taste.
(19:38) Let’s pour coffee in, tare it, then pour in 50-75g of water. After that, start your timer, and let the bloom go for 30 seconds. When you’re pouring the water, make sure to pour in circular motions, starting inside and going out, forming concentric circles. Don’t pour alongside the outside of the filter and let it drip down, try to pour in the center.
At 30 seconds, start your next pour, which will go to 250g. Now you can see that coffee is coming down into the glass. We start our next pour at about a minute and 15 seconds, and the next pour will go to 450 grams.
(21:10) Another question we get is why do we pour circles? Doing this creates turbulence. It’s the same as when you dissolve sugar and water, when you add motion it will dissolve faster… the motion will extract the coffee and add another variable to get peak extraction.
Our final pour is around 2 and 215g, and will reach 600g. Again, make sure to pour slowly, making circles from the inside out.
(22:20) Our final pour was at about 2:20, and you can see the fill line at the Chemex is indicated by a dot on the glass. If you did everything right, your pour should go about halfway up the dot.
(23:04) A lot of people are nervous to try using a Chemex, but I would encourage it. Once you figure out the mechanics of it, it’s very easy, becomes second nature, and produces a super great cup of coffee.
Today I’m brewing our Peru. Our Ethiopian, Guatemalan, Costa Rican, and Brazilian are all great on a Chemex.
(23:45) Since we’re at the 4 min mark, let’s remove the filter by holding the wood part and put it in trash.
Time for the best part: pouring into a cup and enjoying! I’m gonna wait a little bit since I don’t like burning my mouth.
(24:20) Michaela (MJ), what do we have for questions?
(24:40) MJ: Now that you’re getting ready to drink your coffee, two questions are relevant. Derek asked “Is there a way to keep your Chemex hot, long enough for the second cup?”
Matt Vassau (MV): The best way is to pour into a thermos. As I mentioned previously, you don’t want to reheat coffee, since the chemical makeup has changed through brewing and cooling. Continuing to add hot water is also bad. I’ve also seen people make a hot water bed and put it in the oven, but that’s reintroducing more heat so it’s not your best bet and is a lot of work. Another easy option would be to just brew less and use a single cup Chemex.
(26:25) MJ: Lincoln asked “Does a cold mug shock coffee and affect taste?”
MV: The same process we mentioned earlier with preheating the Chemex is applied here. When you pour warm coffee into a room temperature mug, you’re rapidly cooling it and the acidity comes out faster than normal. Great question!
(27:20) MJ: Why should people be using a Chemex vs a basic coffee maker, for example?
MV: With a Chemex, you have more control in the extraction, which means getting the correct amount of soluble parts of coffee that go into the cup. We’re controlling the extraction more in a Chemex, allowing gases to escape, there to be agitation, etc. A very basic coffee maker only has a water tank that pours over the basket and forces it into a flat bottom and has it sit there. This crushes the bloom which then makes it a little more bitter. The conical shape works because there’s more control, whereas; a basket just infuses. A basic coffee brewer works for a quick cup of coffee, but if you want total control, go to a Chemex or a French Press, which is a pure immersion brewer. Or, you can get a higher end brewer like a Bonavita or an Oxo that comes with programming and whats called pulse settings which allows for a bloom. That said, a Chemex is your best manual way to brew coffee.
(31:35) MV: I think we gotta wrap it up, but we’ve got a ton of different brew methods that we like to play with. Maybe we’ll do some other more geeky methods in the future…it’s fun for us and we like to come alongside people and help customers with their experience better coffee and connect in a different way. We want to make the coffees we roast shine!
Thank you for joining us!
Driven Coffee Roasters
In 2013 we launched Driven as a way to make Craft Coffee more approachable and accessible for everyone. We exist to serve our customers through their coffee journey, whether they're just getting started or they're already passionate enthusiasts.
We love introducing people to new flavor profiles, origins, and regions they would otherwise never have been exposed to. Then we strive to help them make the best cup possible by educating them on coffee and brewing.
By focusing our efforts on responsibly sourcing raft roasting and meticulously brewing we're able to serve the best coffees possible to our customers across the country.
More from Our Blog
The Decaf Decoded: How is Coffee Decaffeinated?
Despite the cry of some coffee aficionados that coffee without caffeine is not worth having,...
Nov
Counting Calories? Here’s What’s Really in Your Cup of Coffee.
While there is no such thing as a zero calorie cup of coffee, a cup...
Oct
Driven Coffee’s Guide to Corporate Coffee Gifts
The Perfect Boost for Clients and Employees We get it: thanks to the internet, you’ve...
Oct
Perfectly Brewed: How Many Scoops of Coffee Do You Need?
We’ve all been there. You find yourself staring at an empty coffee pot, and you’re...
Oct
Elevating Coffee Experiences: Driven Coffee Roasters Welcomes Pink House Alchemy
At Driven Coffee Roasters, we are unwavering in our commitment to delivering the very best...
Jul
French Press Recipe: A Clean and Flavorful Brew
As spring unfolds in Minnesota, we at Driven Coffee Roasters are embracing the longer days...
Apr